You’d Never Guess This Stunning Fireplace Was Faux — See Our 5-Step DIY

Finding a home with a built-in fireplace can feel like winning the lottery. For many people, the perfect mantel is an absolute dream of a feature; the focal point around which you can arrange a wonderfully cozy room. But what if we told you that a DIY fireplace mantel is well within reach and surprisingly easy to hack?
Of course, installing a working fireplace can be a bit more complicated, due to the proper heat, gas, and electric safety precautions. But setting up a DIY fireplace mantel can be fairly easy — you don’t even have to be a renovation pro to tackle this project yourself!
Just take a look at the below project by former Havenly designer Autumn Williams for living proof. She wanted to add some character to her Denver home’s living space, which originally featured a flat wall with two evenly spaced windows. By installing a fireplace and floating bookshelves, Autumn was able to create the perfect focal point. And because the fireplace is faux, it didn’t require a ton of heavy lifting or installation.
Below, Havenly designer Melissa Wagner relays her insight on installing a DIY fireplace mantel in your own home.
How to install a DIY fireplace mantel
Before

After

It’s easier than you’d think—promise. You’ll need ceramic tile or a marble slab for the surround, the fireplace mantel of your choice, caulk, and paint.
Step 1: Set your foundation! Lay ceramic tile or marble slab to ground the fireplace and give it a realistic feel—even if it is only decorative.
Step 2: Install the fireplace mantel to the wall according to its instructions.
Step 3: Caulk the edges where the fireplace meets the wall to make it look more like a built-in feature.
Step 4:Paint your fireplace and/or your walls to suit your style (totally optional)!
Step 5: Style your mantel to elevate the scene and make it look authentic.
How to style a DIY fireplace mantel
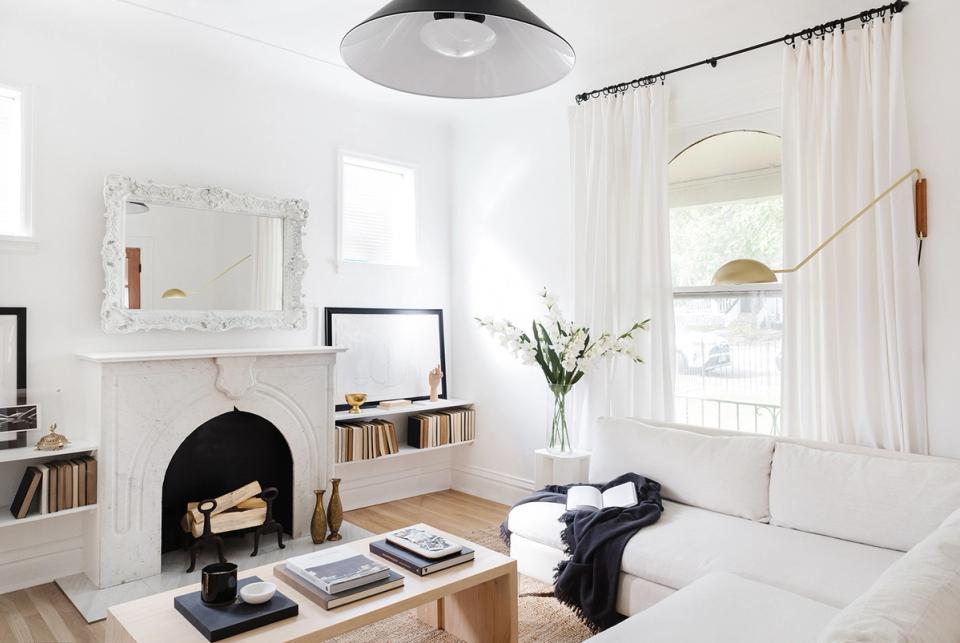
When it comes to styling your mantel, there are a few tips that can help take the DIY above and beyond. First, don’t leave your fireplace empty! Even if you can’t actively use it, you can still create the look of a real fireplace with a log holder and real wood logs, which make it look more authentic. A collection of pillar candles can also look great.
Use the space above your fireplace to display a work of art, florals, or other decor. In Autumn’s space, a statement-making mirror helps to open up the room.
And don’t forget to style around the mantel, too! Autumn added floating shelves on either side of her DIY mantel to incorporate more of her book collection, personal art works and meaningful decor items. Plus, they add to the “built-in” look of the fireplace.
Pro tips for selecting your fireplace mantel

So, you’ve decided to install a DIY fireplace mantel. Now, it’s time to pick the mantel itself—which is a pretty big design decision! Here are a few pieces of advice that can make the choice either, no matter what your style.
For a bold look: Want something that feels a bit more on-trend? Pick your color of choice (perhaps a moody sage?) and paint your whole room, including the fireplace, that color. For this option, we recommend using a fireplace surround that’s made out of an unfinished MDF and solid wood.
For a classic look:Choose a fireplace that is pre-stained or painted black or white—which will still look timeless, even if you switch up your decor now and then.
For a long-lasting DIY:Go with a cast stone fireplace that’s built to last—they come in so many shapes and profiles, from traditional to modern, so you’re bound to find one that resonates with your taste.


Ready to start your very own DIY fireplace mantel? Shop a few of our favorites below, and tap a Havenly designer for expert styling tips!
