Maybe it’s the one eyesore left in your kitchen. Maybe it’s the forgotten half bathroom or uninspired laundry room. You know what we’re talking about: that it was there when you moved in tile that you can’t stand. Whether it’s incredibly dated or off-color for the rest of your home, we have good news: it doesn’t have to be.
If you’re looking for a quick, affordable DIY project to dramatically enhance the look of your home while giving it a fresh pop of personality, painting your dated tile is your next weekend to-do. That means no messy re-tiling and grouting necessary — just a paint lift.
But before you grab your paintbrush, follow our tried-and-true, step-by-step instructions below, as informed by three Havenly interior designers who have pulled off the DIY with flying colors. Learn exactly how to paint tile below.
So, why would I paint my tile?
Tile work is a true craft, and it costs accordingly. If your tile is looking ho-hum (looking at you, boring beige) or like it hasn’t been updated since 1975 (Pepto-pink or sea green squares, anyone?), a fresh paint job offers a get outta jail (almost) free card. So forget extra labor costs or replacing the tile all together. Pencil this DIY project into your calendar instead and give your home a modernized facelift—we’ll walk you through it all.
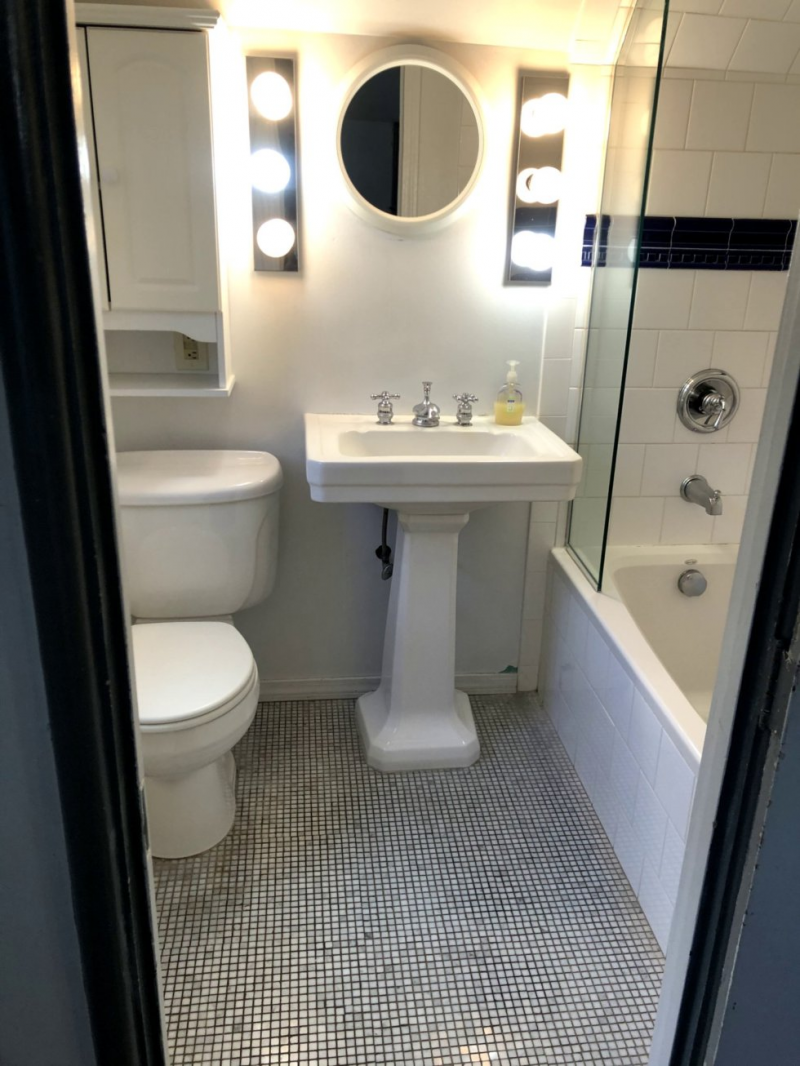
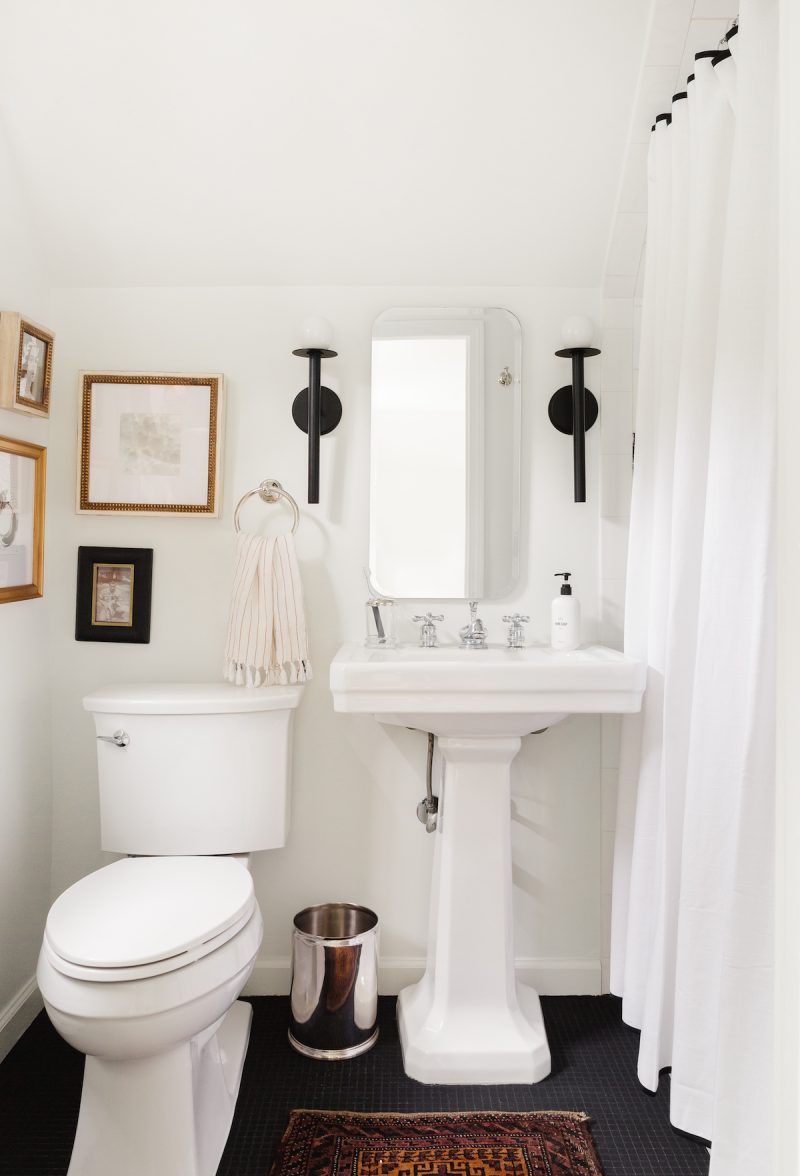
And in case you’re still a bit on the fence, take a peek inside this stunning bathroom tile makeover from our VP of Design, Shelby Girard. Total blah before, but with a coat of matte black (and some lighting and decor upgrades), it becomes a place of pure beauty (as is the rest of her home).
BEFORE
AFTER
How to paint tile: shopping list
First things first: gather your arsenal. Here is your shopping list of must-haves to scoop before all of the fun begins. Most of these items you can pick up on a trip to your local hardware store, or even buy on Amazon (thank goodness for Prime).
- Degreaser or specialty tile cleaner
- Soap
- Rubber gloves
- Rag or sponge
- Bucket
- Caulk
- Sander or sandpaper
- Heavy duty, high quality bonding primer
- Tile paint: look for epoxy, latex, or oil
- Painter’s tape
- Paint tray
- Paint rollers
- Drop cloth
- Optional: paint stencils, if you want to get a little fancy
How to paint tile in 3 easy steps
Here is our official three-step guide to painting your tile, whether on the floor or your backsplash.
1. Prepare the space
A clean space makes for easier cleanup, and less paint splatters found everywhere for the rest of eternity. Make sure your workspace is ready to go by putting away any clutter on the surrounding areas. If you are tackling your backsplash, tuck away any countertop kitchen appliances, stray dishes, and décor. If it’s the floor you’re after, move away any furniture.
Use a drop cloth to protect surfaces, floors, or other nearby furniture pieces from paint flecks and use painter’s tape to mark off any area you don’t want to paint—including the edge of the countertops or around the baseboards.
Our design editor, Heather Goerzen, embarked on her own painted tile project in her kitchen (and yes, she did paint those cabinets, too). The 90’s called and wanted their beige back, so with some strokes of crisp white (and blue) paint, she brought her small kitchen into the current century. Did we mention, the entire makeover cost only $300?
BEFORE
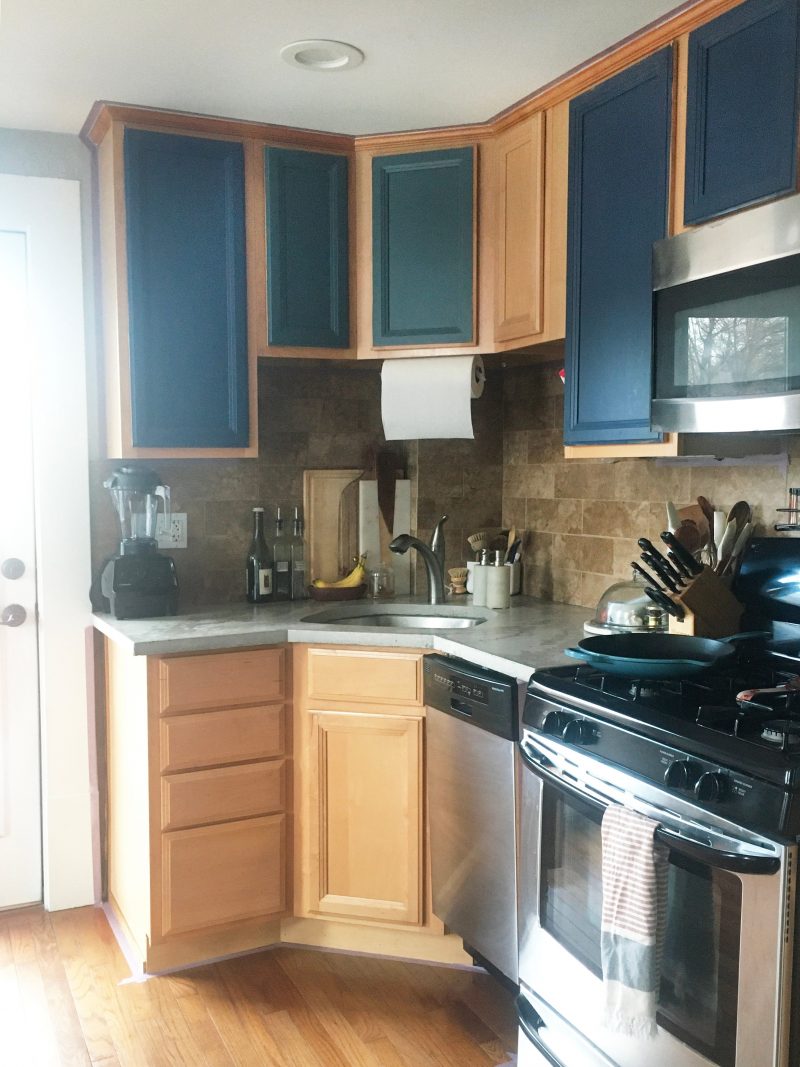
AFTER

2. Prep the tile
This step is where you will spend most of your time and energy, and we cannot emphasize how important it is to properly prepare your tile for painting. First, give your tile the ultimate spring cleaning. Put some elbow grease into it and call it your workout for the day. Use the tile degreaser and follow it with soap and water, scrub-a-dubbing between every nook and cranny. Even the slightest bits of dust, sand, and dirt can hinder your smooth finished product. Thoroughly rinse it all with water and then let it dry—the tile AND the grout (which may take a bit longer)—before moving on.
Next, caulk the tile to repair any chips and cracks. Then, using the sander or sandpaper (sander is the preferred way for a bit more ease!), sand down your tile for a smooth and even surface. Now you’re ready to prime. This step is crucial to avoid scuffs and chips and general frustration down the road. Opt for a quality bonding primer (our team has had success with the brand Stix) and be sure to follow the instructions, giving your tile one coat if it is porous and two if it is glossy. Let it dry before embarking on your actual painting.
Just to say it again for the people in the back, take your time here. Tile that is improperly prepared means paint is less likely to stand up to foot traffic, and can end up looking cheap and messy down the line. Certainly don’t cut corners here!
3. Grab that roller
Pause. Breathe. Sip a glass of wine. Crank that playlist. Because we’re almost there. It’s time to actually paint the tiles. (This is the fun part.)
Not all paints are created equal. Tile requires the use of a special latex, oil, or epoxy paint that’s made to adhere to the tile surface and withstand the use and abuse it may incur. Using a roller, paint over the tile and grout to ensure evenness. You can use a smaller brush in between tiles to smooth out where extra paint may collect during the process. Let it dry for 24-48 hours. If needed for full coverage, apply another coat and let it dry again before placing furniture or appliances back on or near it.
Back to Shelby’s place to tour her reimagined sunroom, which goes from dark and dingy to light and bright with a fresh coat of white on her floors. This last tile paint project should be all you need to start picking your new shade right. now.
BEFORE
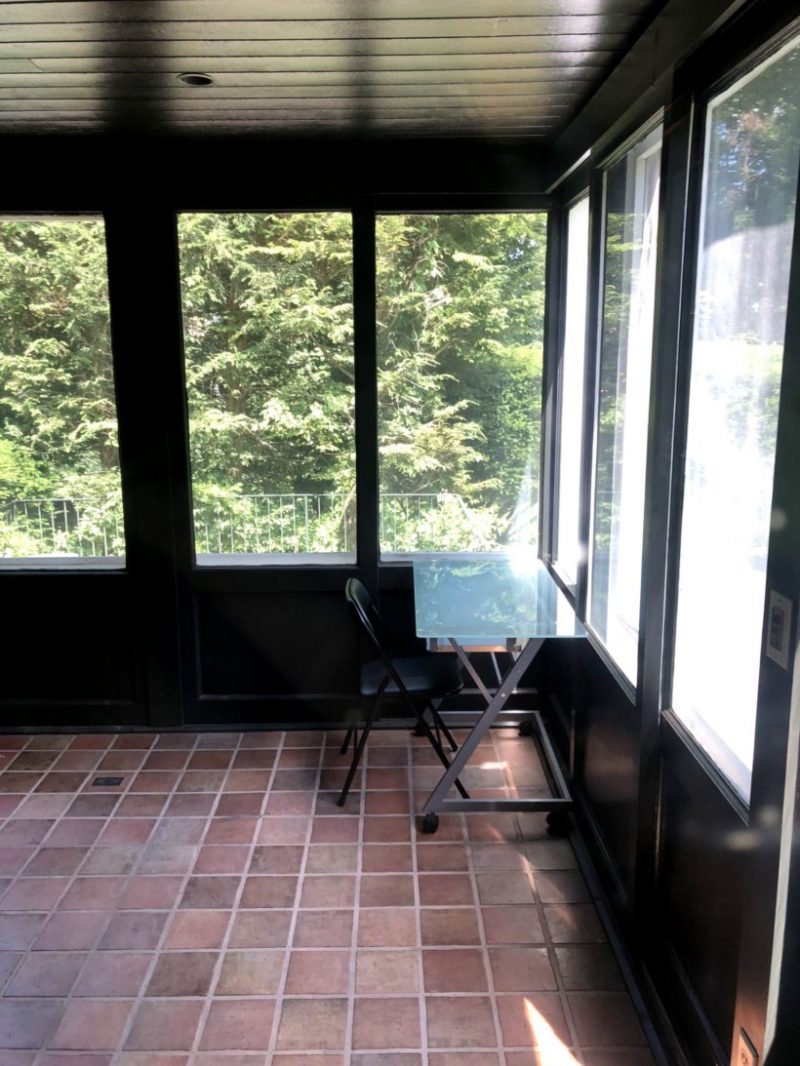
AFTER

Bonus points for you overachievers
If you’re looking to go the extra mile or bring some extra pizazz to your space, paint stencils are an option to create a more ornate look. Stencils take a bit more time and patience as you need to ensure the patterns match up just so from square to square. Dark colors like navy look especially eye-catching against lighter or white bases. Just be sure to let the base coat dry before placing and painting your stencil.
Now go ahead, and pat yourself on the back for a job beautifully done. Your home, and your wallet, will thank you for this DIY masterpiece. Not to mention all the compliments to come…
While we love a DIY project, sometimes refreshing your space is simply a matter of some good design advice and a little styling love. That’s our specialty. Take our style quiz to meet your pro design partner.

