It’s a tale as old as time: You spend weeks searching for the perfect design DIY on Pinterest (or exploring real life Havenly designs), and finally come across a beautiful but approachable inspiration photo. Then comes visualizing, researching, and planning for the big home design event. But when it comes time to actually whip out the paint brushes, electric drill, or circular saw and get down to business, you get cold feet.
Honestly, it’s completely understandable. Unlike buying a new top or attempting a new art project, home updates are often costly, time-consuming, and semi-permanent. Even the cheapest can run you a couple hundred dollars. In other words, there’s a lot at stake, especially when attempting a bold home purchase, going the DIY route, or both.
But enough of the fear-mongering — we’re of the opinion that when done correctly, the biggest design risks are the most rewarding and impactful. Good design is all about taking risks, experimenting, and making your home uniquely yours. To further temper your anxiety, we tapped our head designers for the transformative home updates they were very unsure about, but ended up loving down the line. Find their candid stories below, and consider this an invitation to finally embrace the out-of-the-box design idea you’ve been dreaming about.
The DIY Kitchen Cabinets

DESIGNED BY HEATHER GOERZEN
When we first toured our little condo, I immediately knew that I wanted to update the kitchen. But for the life of me, I couldn’t decide how. I toyed with painting the cabinets and replacing the tile myself, splurging on custom cabinetry or going the IKEA and Semihandmade route, investing in a professional paint job, or renovating the entire kitchen to my exact specifications. I even got as far as painting large swatches on the cabinet doors and leaving them there for a casual ten months as I continued to waffle.
When lockdown hit and we had more time at home, I finally pulled the trigger and finished the paint job myself. I also ended up painting the backsplash and investing in some fancy new hardware. To my surprise, what started as a temporary hack turned into my dream kitchen — we were really pleased with the upgrade! Considering the project only cost $300 versus $15,000, it looks even better. It was 100% the right decision for this space, our budget, and our long-term home goals.
The Lounge-Worthy Sectional

DESIGNED BY HEATHER GOERZEN
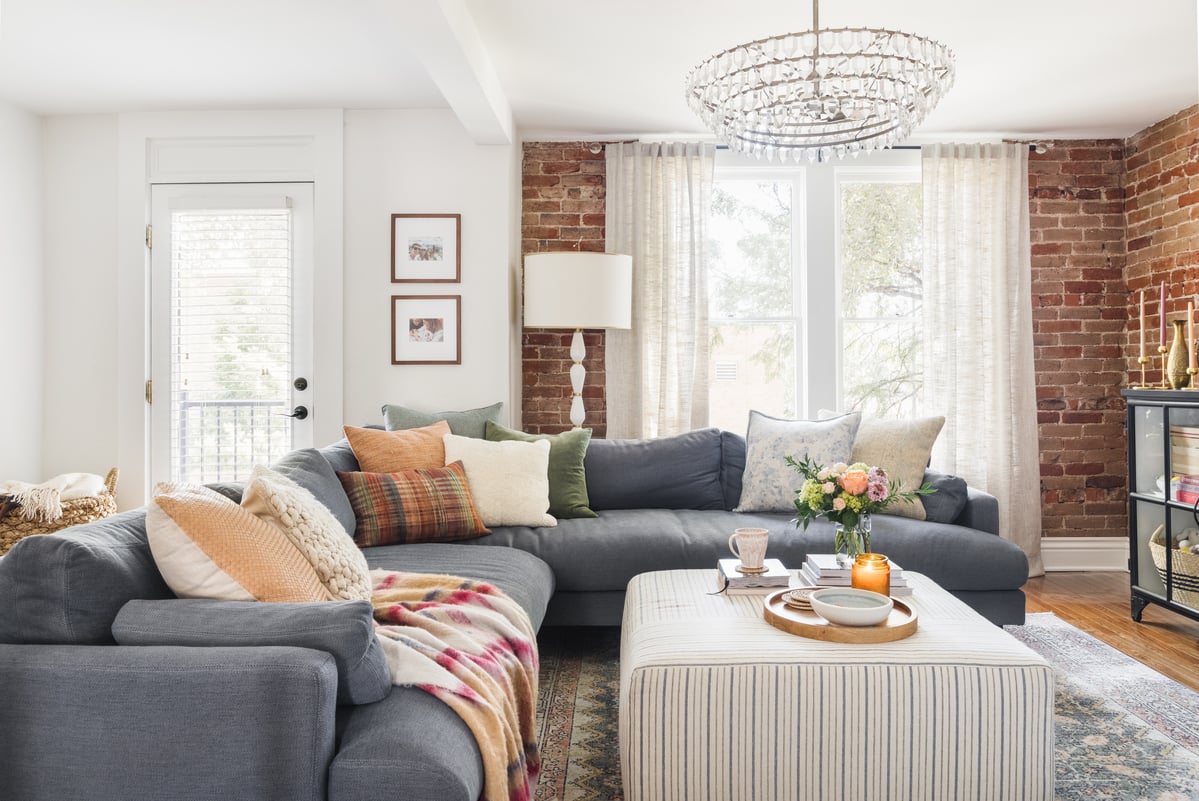
As mentioned, our home is small. We’re talking 750 square feet. But even a lack of space couldn’t temper my love for deep, lounge-worthy sectionals. They’re basically a requirement for having people over and eating pizza while bingeing Netflix in a perma-horizontal position — two activities I simply couldn’t give up.
So I began the hunt for the perfect oversized sectional that wouldn’t overwhelm the space. I eventually found the one at Crate and Barrel: lengthy enough for my 6-foot-plus husband, but small enough for optimal flow.
But still, I was terrified that it would dominate the room. To ease my anxiety, I mapped out the entire floor plan using boxes and chairs. I measured more times than I can count. I made sure there was ample floor space and walkways. And eventually, I pulled the trigger. Even after it arrived, I had a couple of sleepless nights worrying that it was too big. While I loved the piece itself, I was definitely pushing the scale rules.
Slowly but surely, the space came to life exactly as I’d hoped. I added a few signature pieces, including a vintage-inspired rug, larger sideboard, and statement shearling chair. Now, I think the sectional anchors the design and maximizes seating in a way that no other layout could. Win!
The High-Contrast Trim Paint

DESIGNED BY BRADY BURKE
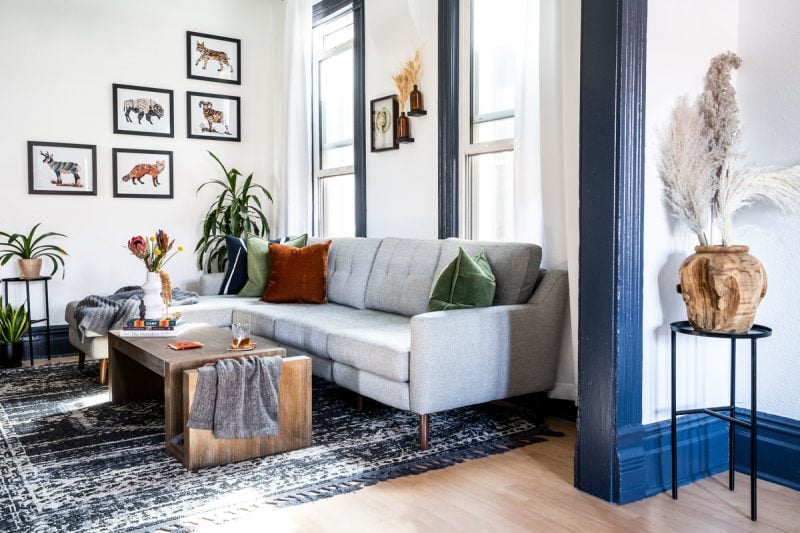
The first time we toured our house, we immediately fell in love with the original trim from 1884. I basically became an old man, talking to anyone willing to listen about how “they just don’t make ‘em like they used to.” After we closed, we knew we wanted to accentuate the high ceilings and intricate moulding throughout, but didn’t quite know how.
What we did know was that the entire house needed a paint job, stat. The walls were yellow, the trim was a slightly different color, and the space felt dated and small. With only 970-square-feet to work with, that simply wouldn’t fly. We wanted it to feel open and bright, so we considered white walls with off-white trim, or vice versa. But we ultimately decided that it was too safe, and wouldn’t highlight the trim like we envisioned.
While I had my reservations, we eventually decided to paint the trim Hale Navy by Benjamin Moore. This color is truly stunning — it changes based on the time of day and appears almost black at night, eggplant in low light, and rich navy in full light. I love how dynamic and unexpected it looks against the white paint — it’s hands-down my favorite home decision I’ve ever made.
The Floor-to-Ceiling Bookcase

DESIGNED BY VIVIAN TORRES
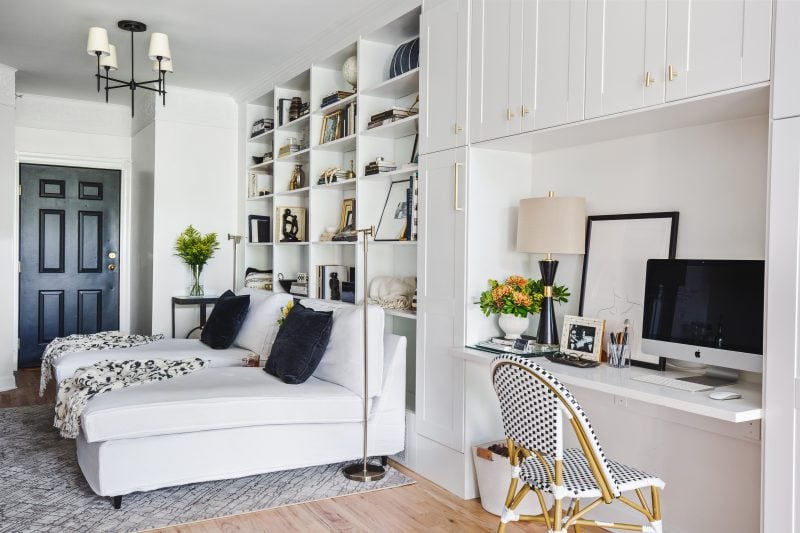
I’ve always loved classic rooms — the kind you see in large estates with floor-to-ceiling bookcases that span an entire wall. So when it came time to redesign the condo I share with my husband, I knew that I wanted to recreate that grand reading room aesthetic.
Of course, I had my doubts about this project. First, I was only working with 700 square feet, and tall bookcases could easily overpower the room. I tried to find inspiration photos of grand bookcases in small spaces, and came up empty. Second, I have a baseboard heater running along the bottom of the wall, meaning we’d have to build a vented base to support the bookcases. In other words, installation would be even more complicated. Lastly, I love reading but I wouldn’t consider myself a bookworm. Did we even need bookcases? What would I fill them with?
Eventually, I threw caution to the wind and dove into the project head-first. I figured that if all went to plan, I’d end up with a pared-back version of my dream home, and if I failed, I’d have a lot of extra storage. The project was daunting, but in the end I love the way it turned out. The bookcases make the room feel cozy and add a ton of height, giving the illusion of more space. Unforeseen bonus: my husband and I read more!
The Picture Ledge

DESIGNED BY KELSEY FISCHER
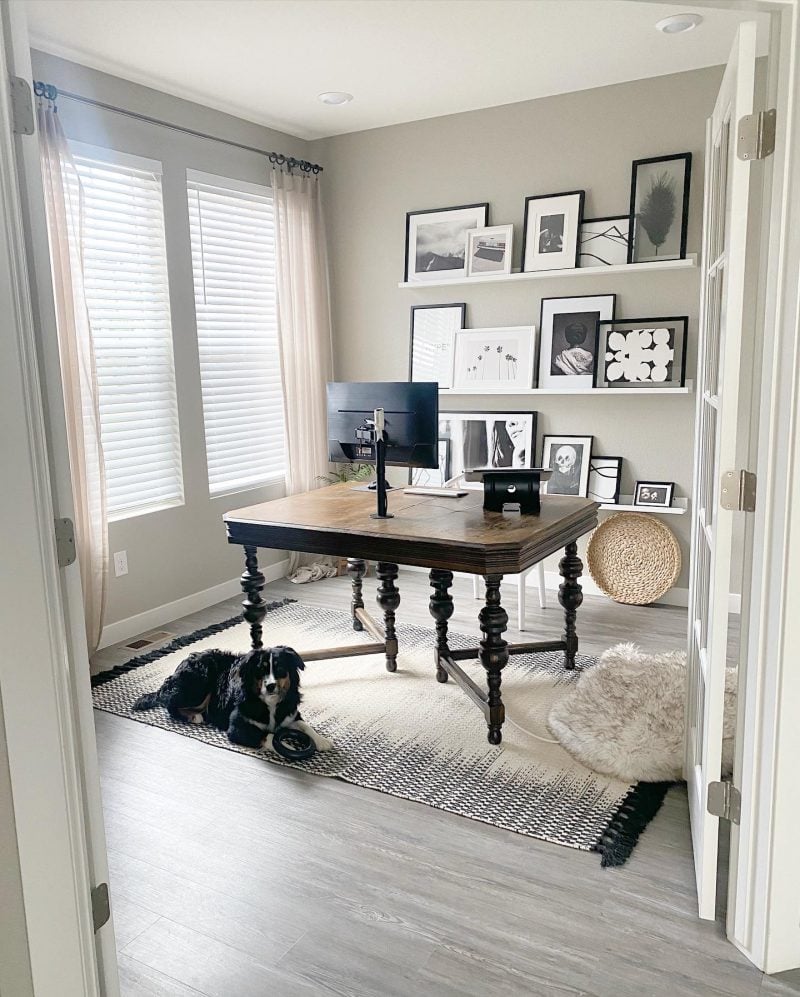
I’m currently renting a beautiful townhouse that I love, but it definitely needed a little TLC, particularly in the office. I ultimately decided that a picture ledge was the perfect way to jazz up the largest wall in the space, without making any permanent changes.
But I soon discovered that I couldn’t find the 68-inch ledges that I needed without spending an arm and a leg, which wasn’t in the cards for a rental. After hours of hunting, I eventually found 24-inch and 44-inch ledges that together would hit the 68-inch mark. Of course, I was concerned that the adjoining seams would look awkward and ruin the effect.
But, determined to stay in-budget, I threw caution to the wind and gave my improvised ledge a shot. I’m so glad I did! You can’t even tell that they’re two different sizes, and I absolutely love the look. I definitely think the artwork helps — I went with high-contrast black and white pieces, which align with my overall design aesthetic and provide a impactful visual distraction.
Considering a design risk of your own but need a second opinion? Take our style quiz to get paired up with your dream designer.

